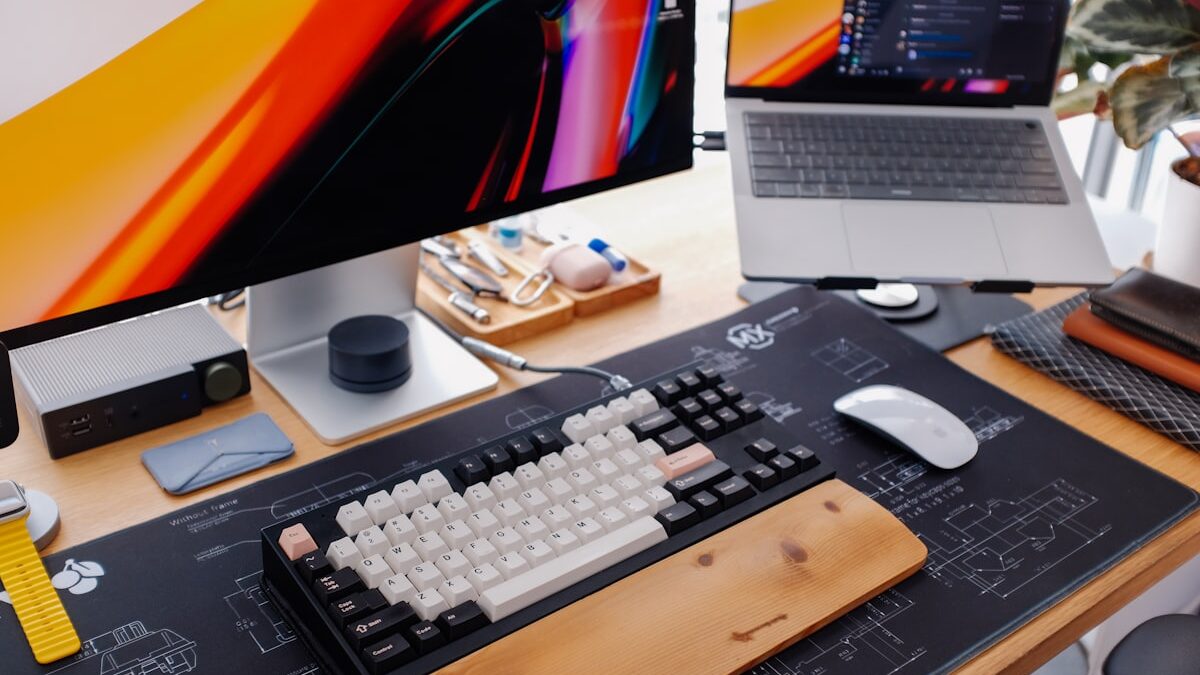
Most people build their WFH desk setup in exactly the wrong order. They spend $60 on an RGB desk pad, then $150 on a monitor arm with cable management channels, and six months later they’re still hunching forward on a dining chair with the monitor two inches below eye level. The WFH desk setup 2026 standard isn’t about aesthetics — it’s a framework, and the framework has a specific sequence. Ignore the sequence, and no amount of gear fixes the problem.
This guide gives you that sequence, step by step, with clear criteria for every decision.
Step 1 — Start With Ergonomics, Not Aesthetics
The ergonomics priority stack goes in this order: chair lumbar support first, monitor at eye level second, keyboard at elbow height third, everything else last. The research is clear — musculoskeletal issues from poor posture accumulate over months and are significantly harder to reverse than to prevent.
Before buying anything else, audit what you already have:
- Chair: Can you adjust seat height so your feet are flat on the floor and your thighs are roughly parallel to it? Does the lumbar support actually contact your lower back, or does it sit two inches below it?
- Monitor height: Is the top of the screen at or just below eye level? If you’re looking down at a laptop screen on a desk, that’s forward head posture accumulating at roughly one additional pound of force per inch of tilt.
- Keyboard height: Are your elbows at approximately 90 degrees, with wrists neutral (not bent up or down)?
If your chair fails the lumbar test, that’s the first dollar you spend — not a monitor arm, not a desk mat. A solid ergonomic chair in the $200–$350 range solves more productivity problems than any peripheral. We’ve reviewed the leading options in our guide to the best ergonomic office chairs under $300 — start there before touching anything else in this list.
Step 2 — Choose Your Desk (Size and Height Matter More Than Style)
The desk decision framework is simple. If you run dual monitors, minimum 55 inches wide — 60 inches is the practical ideal. Anything narrower forces your monitors into angles that defeat the purpose of having two screens. Single monitor with peripheral space? 48 inches is workable; 55 inches gives you room to breathe.
Height: a fixed desk should put the surface at approximately elbow height when seated in your adjusted chair. For most people, that’s 28–30 inches. If you’re significantly taller or shorter than average, fixed desks become a compromise.
On sit-stand desks: They’re worth it if your budget allows the $400+ range for a quality motorized unit. The data on alternating sitting and standing throughout the day shows measurable reductions in back pain and afternoon fatigue. Budget sit-stand converters that sit on top of a fixed desk are a different category — they shift your monitor and keyboard up but leave your chair at the wrong height, defeating the ergonomic stack from Step 1.
On L-shaped desks: Good if you have a dual-role setup (work + gaming, or work + creative work) where you physically rotate between two workstations. Less useful if you’re buying an L-shape just for the extra surface area — a straight 60-inch desk with a side shelf achieves the same result with less footprint.
Step 3 — The Monitor Setup That Prevents Neck Pain
The sweet spot for WFH in 2026 is a 27-inch 1440p IPS panel. Here’s why that’s the right specification, not just a popular one:
- 27 inches at 1440p hits approximately 109 PPI — sharp enough that individual pixels aren’t visible at a normal 24–30 inch viewing distance, without the scaling complexity of 4K on a work machine.
- IPS panel gives you accurate color across the viewing angle, which matters if you’re reviewing documents, images, or any content where color fidelity is part of the work. TN panels are faster but visibly shift color when you move your head; VA panels have better contrast but slower pixel response on fast content.
- Matte finish over glossy. Office lighting environments almost always include overhead sources or windows that create glare on glossy panels. Matte coatings eliminate this without meaningfully reducing color quality in normal work conditions.
- USB-C with Power Delivery simplifies the cable situation dramatically — one cable runs video, data, and charges your laptop simultaneously. For setups with a modern laptop as the primary machine, this is worth prioritizing specifically.
A monitor matching this spec — 27-inch, 1440p, USB-C PD — covers the full ergonomic and workflow brief. Browse current 27-inch 1440p USB-C monitors on Amazon to find the current generation at the right price point.
Placement: Top of screen at or slightly below eye level, arm’s length away (roughly 24–30 inches from your face). A monitor arm is worth the $30–$60 investment here — it lets you dial in exact positioning that fixed stands rarely allow, and it reclaims significant desk depth.
Step 4 — Lighting That Actually Works (Not Just Looks Good on Camera)
The lighting mistakes in WFH setups cluster around two failure modes: overhead-only lighting that creates harsh shadows on your face during video calls, and ring lights that look polished on camera but cause eye fatigue within an hour of use.
The correct lighting framework for a WFH desk:
Key light to the side, not behind the monitor. A desk lamp or panel light positioned 45 degrees to one side of your face provides natural, flattering illumination for calls and adequate task lighting for screen work. The specific direction (left or right) is personal preference; just avoid centering it directly behind or above your monitor.
Bias lighting behind the monitor. A strip of indirect LED light behind your monitor, pointing at the wall, reduces the contrast between your bright screen and the darker surrounding area. This contrast reduction measurably decreases eye fatigue over a long work session. Color temperature: 6500K (daylight) if your room is bright; 4000K (neutral white) for dimmer environments.
Ring lights for calls, not for extended work. If video quality matters for your role, a ring light produces flattering, even illumination. But the diffuse, flat light they create is uncomfortable to work under for extended periods. Use them for calls; switch to your key light for focused work.
Avoid positioning any light source directly behind your monitor (window or lamp) — the screen-versus-background contrast creates exactly the eye fatigue bias lighting is designed to prevent.
Step 5 — Audio for Calls (The One Thing Everyone Gets Wrong)
Your laptop’s built-in microphone picks up keyboard noise, room echo, HVAC hum, and your neighbor’s dog. To every person on a call with you, that audio signals “this person hasn’t invested in their setup” — and, more practically, it requires everyone else to work harder to parse what you’re saying.
A USB cardioid microphone at desk level, positioned 6–8 inches from your mouth, transforms call quality in a way no camera upgrade or background filter can. Cardioid polar patterns capture sound primarily from directly in front, rejecting room noise from behind and to the sides. The result is voice audio that sounds clean and close — the difference is audible and immediate.
Placement matters: the mic should be below your chin line (not obstructing your camera view) and aimed at your mouth, not your chest. Boom arm positioning — not a fixed stand — lets you hit this angle without the mic taking up desk real estate when not in use.
We’ve benchmarked the leading options in our guide to the best USB microphones under $100 — most of the options in that range outperform anything a laptop or headset mic delivers. If you want to skip straight to shopping, browse USB cardioid desk microphones on Amazon filtered to the $60–$120 range.
On Bluetooth headsets: A solid Bluetooth headset with active noise cancellation is a legitimate second option, particularly for mobile or multi-device setups. The tradeoff is audio quality — even good Bluetooth headsets compress the call audio in ways a dedicated USB mic doesn’t. For roles where call quality is part of how you’re perceived professionally, the dedicated mic wins.
Step 6 — Cable Management and the Finishing Touches
Cable management is the last step for a reason: run it too early, and every subsequent addition or adjustment means redoing it. Once your ergonomic stack, desk, monitor, lighting, and audio are in place and tested, then you lock in the cables.
The practical system:
- Under-desk cable tray (screw-mount or clamp-on): runs your power strip and any cables that travel from desk to floor. Keeps the floor clear and the under-desk space organized.
- Velcro ties, not zip ties: velcro allows adjustment when you swap devices; zip ties require cutting and replacing. Use velcro ties to bundle cables that run together, then route them through the tray.
- Power strip with USB ports, mounted under the desk: eliminates the power brick cluster on the floor and keeps charging cables short. Look for a unit with a surge protector rating — WFH setups running monitors, audio interfaces, and lighting are worth protecting.
- Grommet holes: if your desk has them, use them. They route cables cleanly from surface to under-desk tray without cables draping over the edge.
The goal isn’t invisible cables — it’s organized cables that don’t require your attention. A setup where every cable has a fixed path and is secured takes five seconds to trace if something stops working.
Frequently Asked Questions
What’s the most important thing to buy first for a WFH setup?
The chair. Ergonomics follows a strict priority order: seating position affects everything above it — monitor height, keyboard height, arm position. A $300 monitor with a bad chair is less productive than a mediocre monitor with a chair that actually supports your spine. Fix the foundation before adding anything else to the stack.
How much should I spend on a home office chair?
The useful range for a chair that provides genuine lumbar support, adjustable seat height, and armrests is $200–$400. Below $150, you’re in commodity territory where lumbar support is marketing copy rather than functional design. Above $500, you’re paying for premium materials and brand positioning rather than meaningfully better ergonomics. The $200–$350 range covers most people’s needs. Our guide to the best ergonomic office chairs under $300 covers the specific models worth considering at that price point.
Is a standing desk worth it for WFH?
Yes, with the right budget. A quality motorized sit-stand desk in the $400–$700 range (full desktop unit, not a converter) delivers real benefit when used correctly — alternating roughly 30–40 minutes sitting with 20–30 minutes standing throughout the day. The key word is “correctly”: a standing desk used exclusively for standing, or one that stays in sit position because adjustment is inconvenient, delivers no benefit over a fixed desk. If a motorized unit is outside budget, a quality fixed desk at the right height is more valuable than a budget sit-stand converter used inconsistently.
What monitor size is best for working from home?
27 inches at 1440p resolution is the practical optimum for single-monitor WFH. It’s large enough to keep two documents side by side at full legibility, doesn’t require excessive head movement to scan across the screen, and scales well with standard display settings. 32 inches becomes useful for specific workflows (video editing, large spreadsheets, multi-window reference work) but requires more desk depth to maintain comfortable viewing distance. 24-inch monitors at 1080p remain workable but increasingly feel constrained as screen real estate for multitasking. Dual 24-inch monitors are a valid alternative to a single 27-inch — wider total workspace, but requires a wider desk and more consistent cable management.
The WFH desk setup 2026 that actually works is less about the gear on your desk and more about the order you build it in. Start with what touches your body (chair, keyboard position), then optimize what your eyes spend the day looking at (monitor height and quality), then address the signals you send to others (audio, lighting), then lock it in with cable management. Follow that sequence, and every dollar you spend compounds on the ones before it.
Deixe um comentário